
Once the device configuration is complete, the device will be connected, and when it is ready, the dashboard, mount control 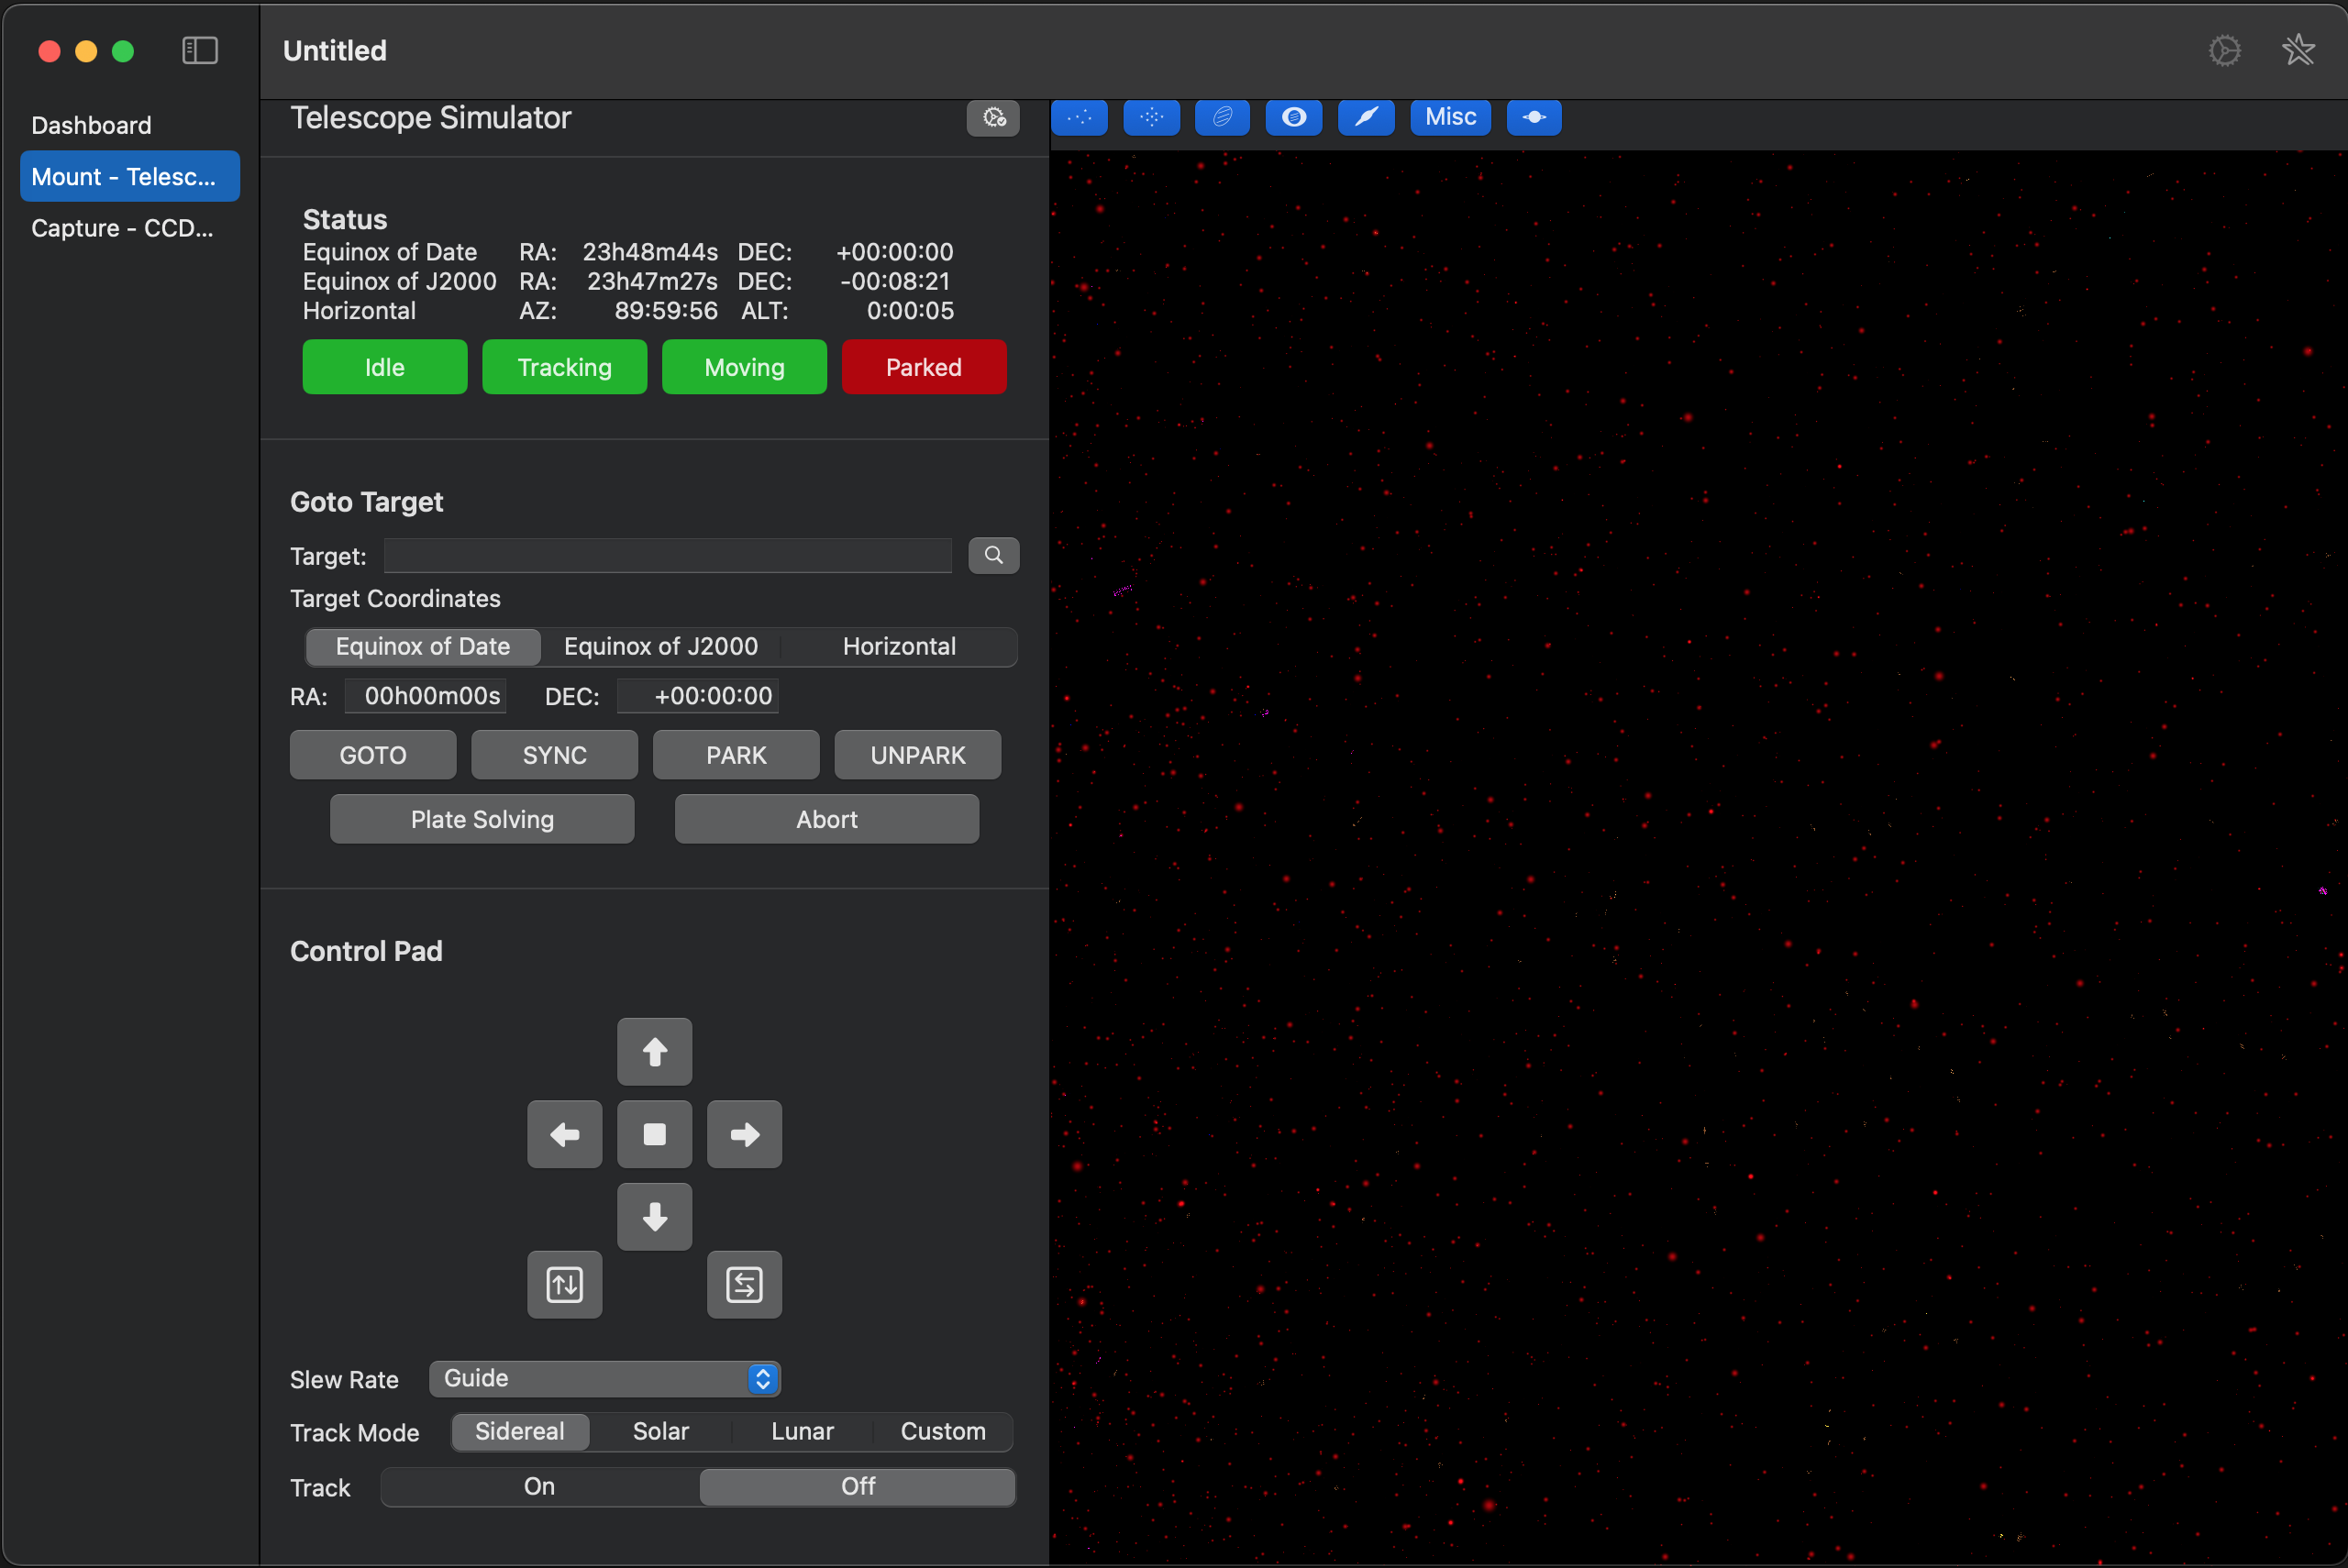 window, and camera control window will be displayed. At that time, if the latitude, longitude, and altitude have not been set, a window will be displayed to input the latitude, longitude, and altitude. If you do not enter the latitude, longitude, and altitude of the observation site here, the equatorial mount will move unexpectedly and cause an accident, so be careful.
Equatorial mount control screen To introduce the celestial body you want to photograph, select the mount tab to display the mount control window. You can move the equatorial mount manually with the control pad. To select the celestial body you want to introduce, click the magnifying glass button in the target introduction area and select from a list of various celestial bodies, or right-click 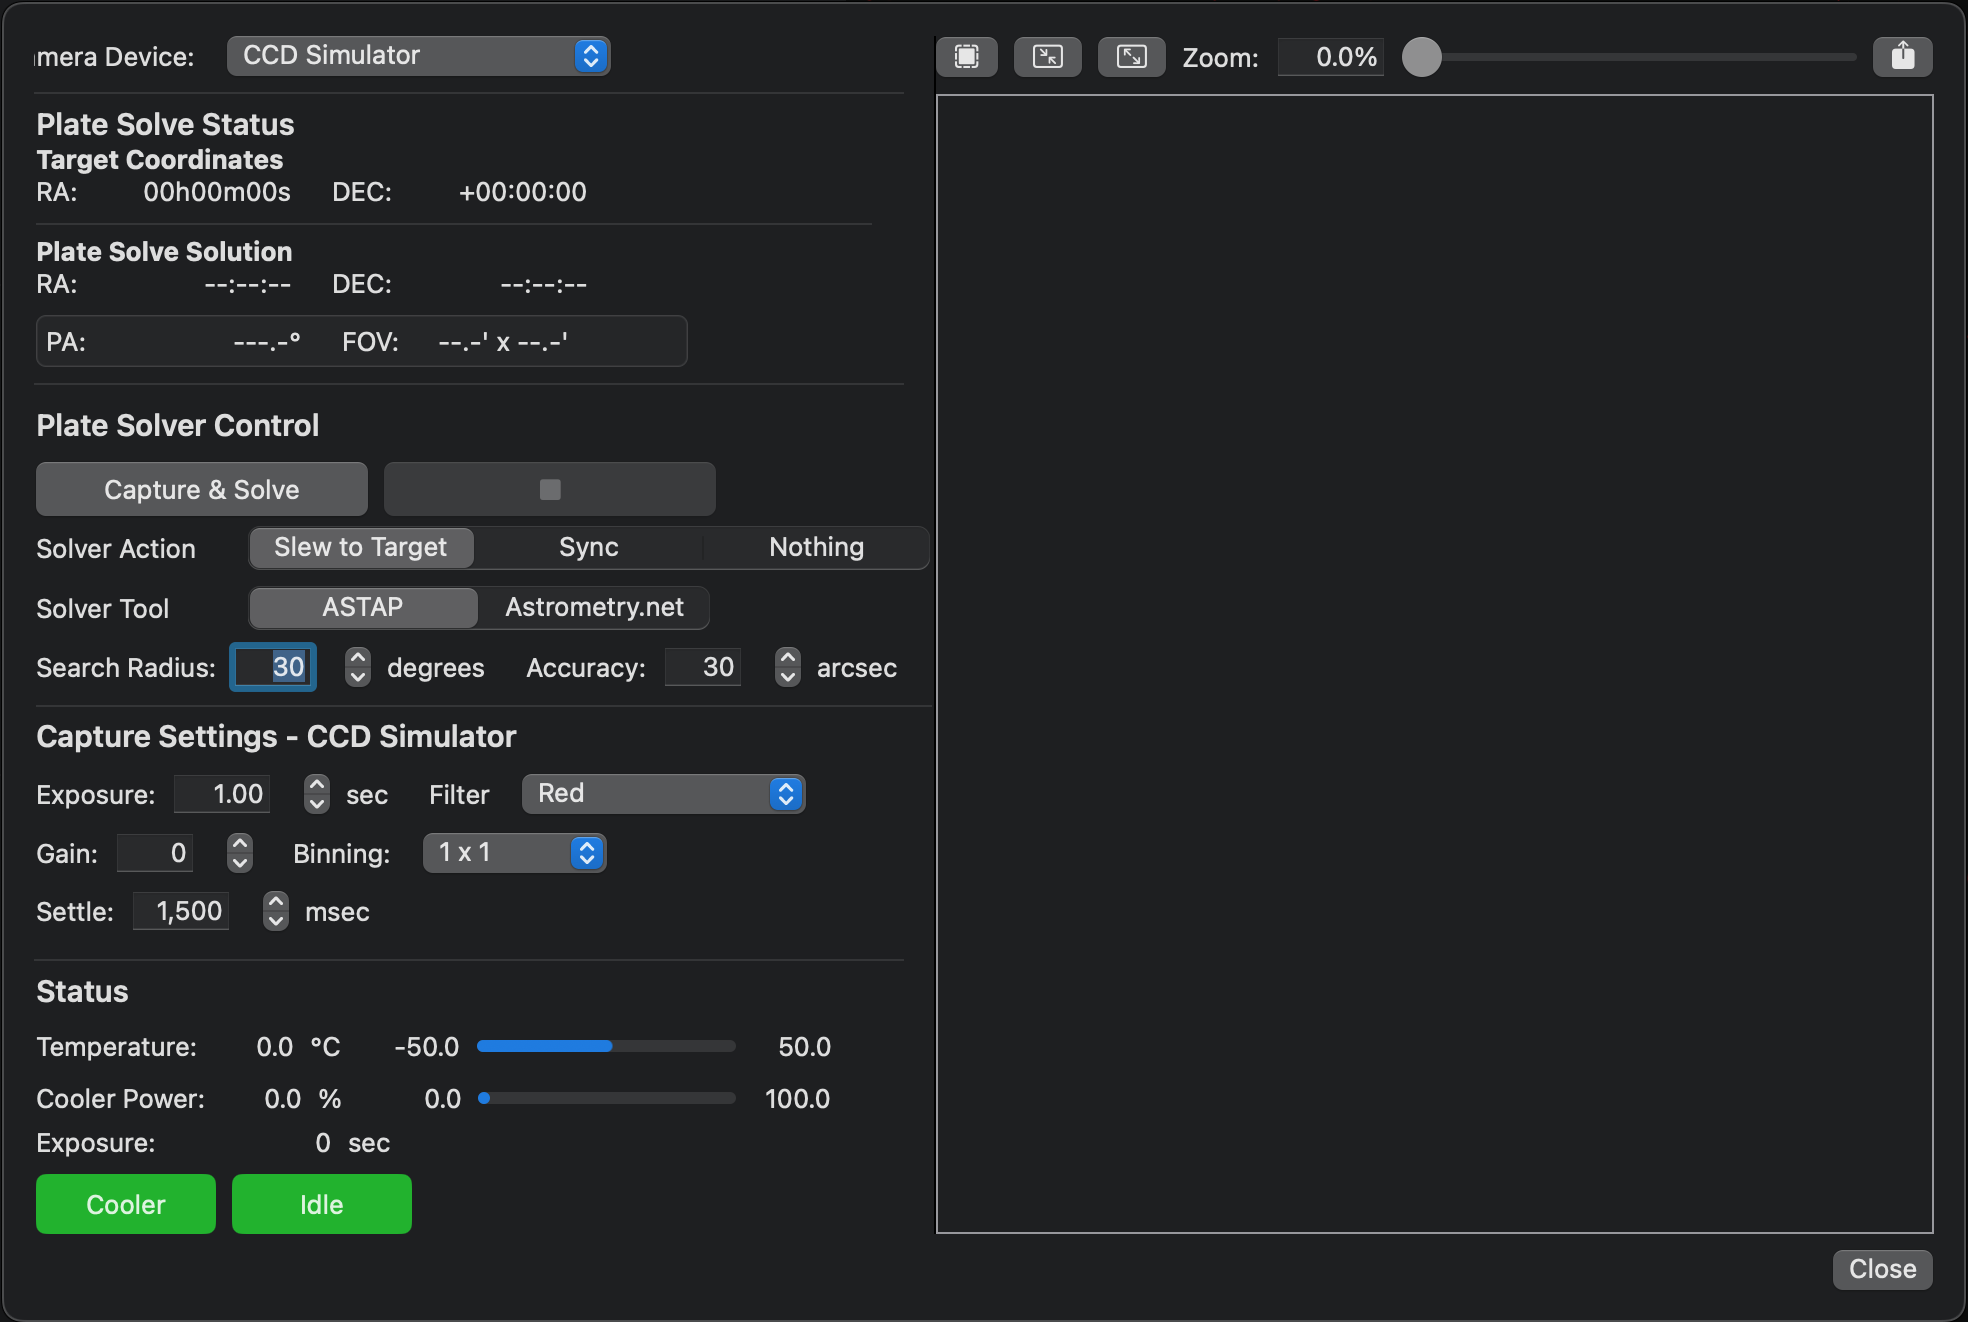 on the star chart on the right to select the celestial body. After that, click the introduction button and the equatorial mount will start operating toward the target delayed.
If you want to interrupt the introduction, click the interrupt button. On the other hand, if you want to introduce the target celestial body to the center of the field of view, click the Plate Solving button and the PlateSolver window will be displayed.
In the PlateSolver window, check the search radius and accuracy. If the search radius is too large, it will take time, and if it is too small, you will not get the result plate solving screen.