When you start ParsecDeepSky and create a new observatory from the Welcome window or open an existing observatory, the  initial window will be displayed. When you create a new observatory and open the initial window, you must first configure the INDI server, etc. Click the gear-shaped button in the upper right corner of the initial window.
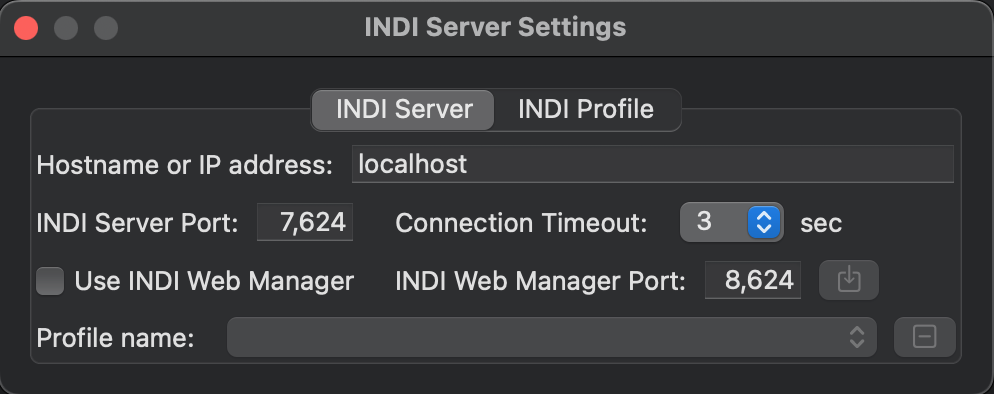 When the INDI server configuration window appears, enter the hostname or IP address of the PC or Raspberry PI on which the INDI server is installed. The INDI server port can be left as the default, but if you have changed the port number, change it to the correct number.
Next, if you are using the INDI Web Manager, check the box. The port number can be left as the default, just like the INDI server, but if you have changed the port number, change it to the correct number. If you are using the INDI Web Manager, click the button to the right of the INDI Web Manager port to obtain data such as profiles and driver lists from the INDI Web Manager.
Once data acquisition is complete, you will be able to select a profile name. If you want to use a registered profile name, sele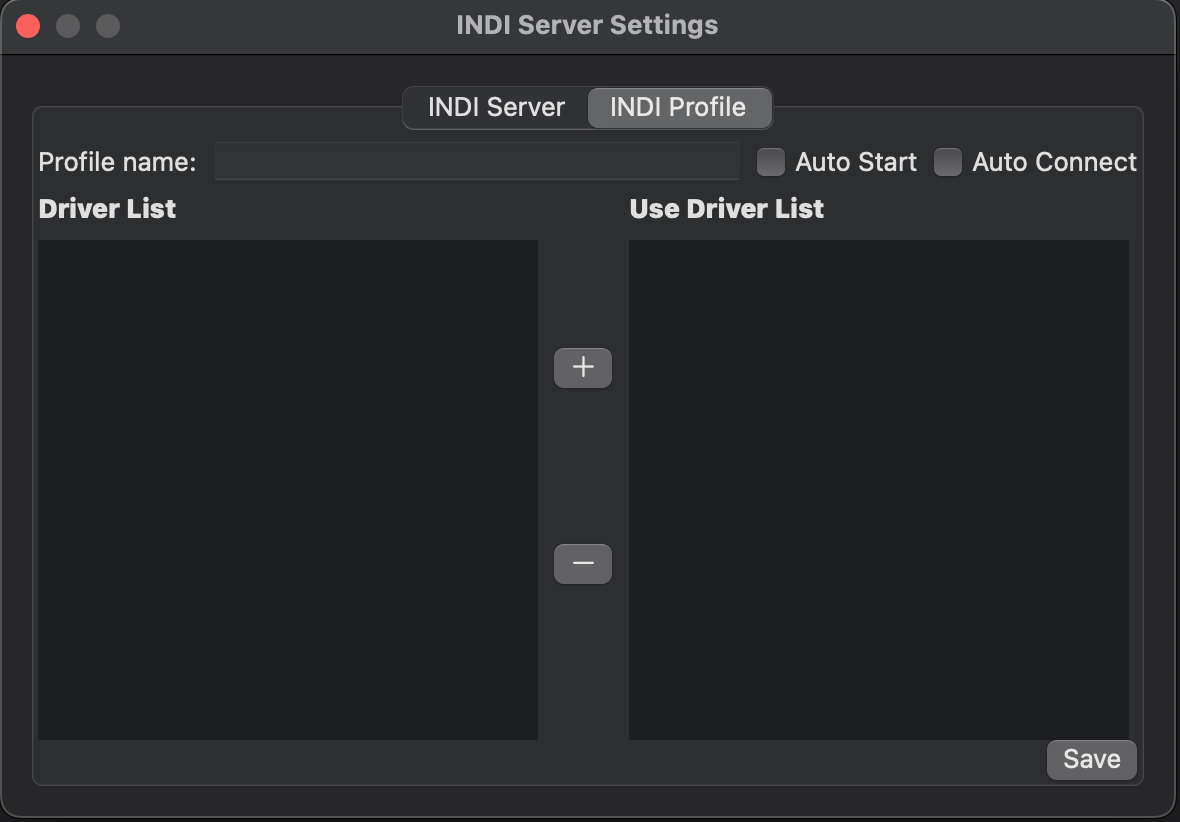 ct it and then close the window.
To modify a profile, select the profile you want to modify from the profile names. If you are creating a new profile, make sure that the Profile Name list is blank.
Next, click INDI Profile and you will be redirected to the window shown on the right. For a new profile, enter a profile name and check Auto Start and Auto Connect if necessary.
Next, select the driver you will use. Select the driver you want to use from the driver list on the left and click the + button in the center. This will add the selected driver to the list of used drivers. Make sure all drivers you will use are displayed in the list of used drivers. Once you have finished setting up the INDI profile, click the Save button at the bottom right to reflect the settings in the INDI Web Manager.
This now completes the INDI settings, so close the INDI Server Settings window with the Close button at the top left.

 In addition, one equatorial mount can control one telescope, one telescope-attached device, and one camera with fileter wheel. A shooting system device is configured for each equatorial mount, and a window is linked to each equatorial mount in the app to control the shooting system.
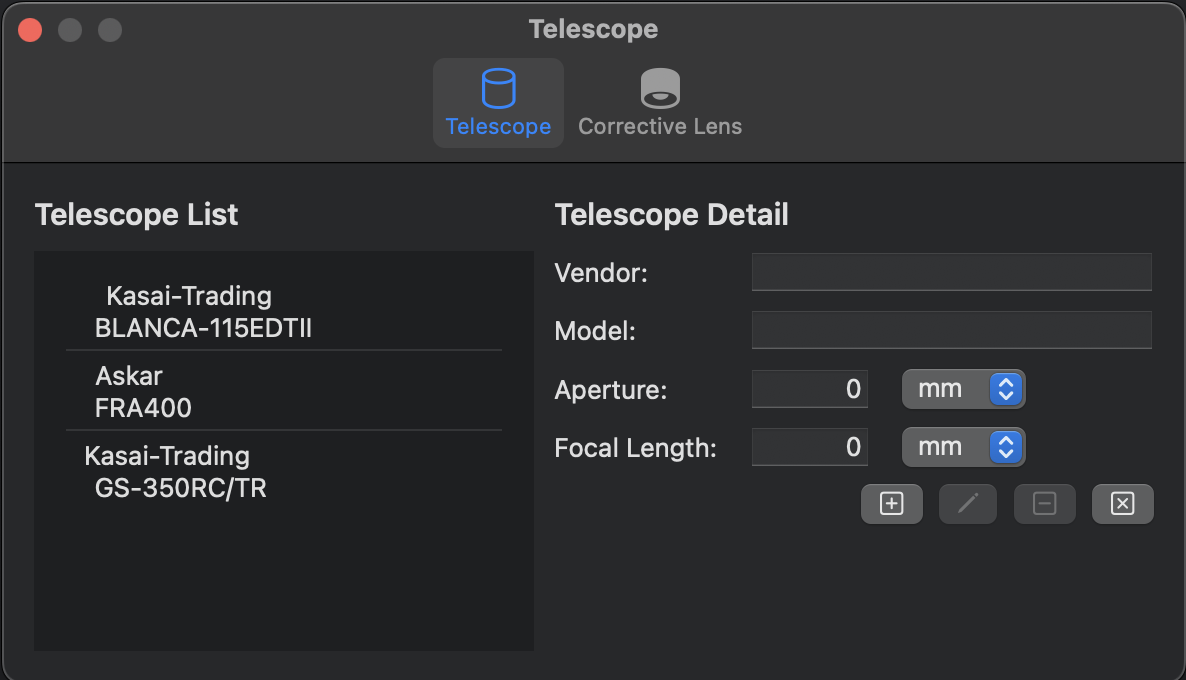
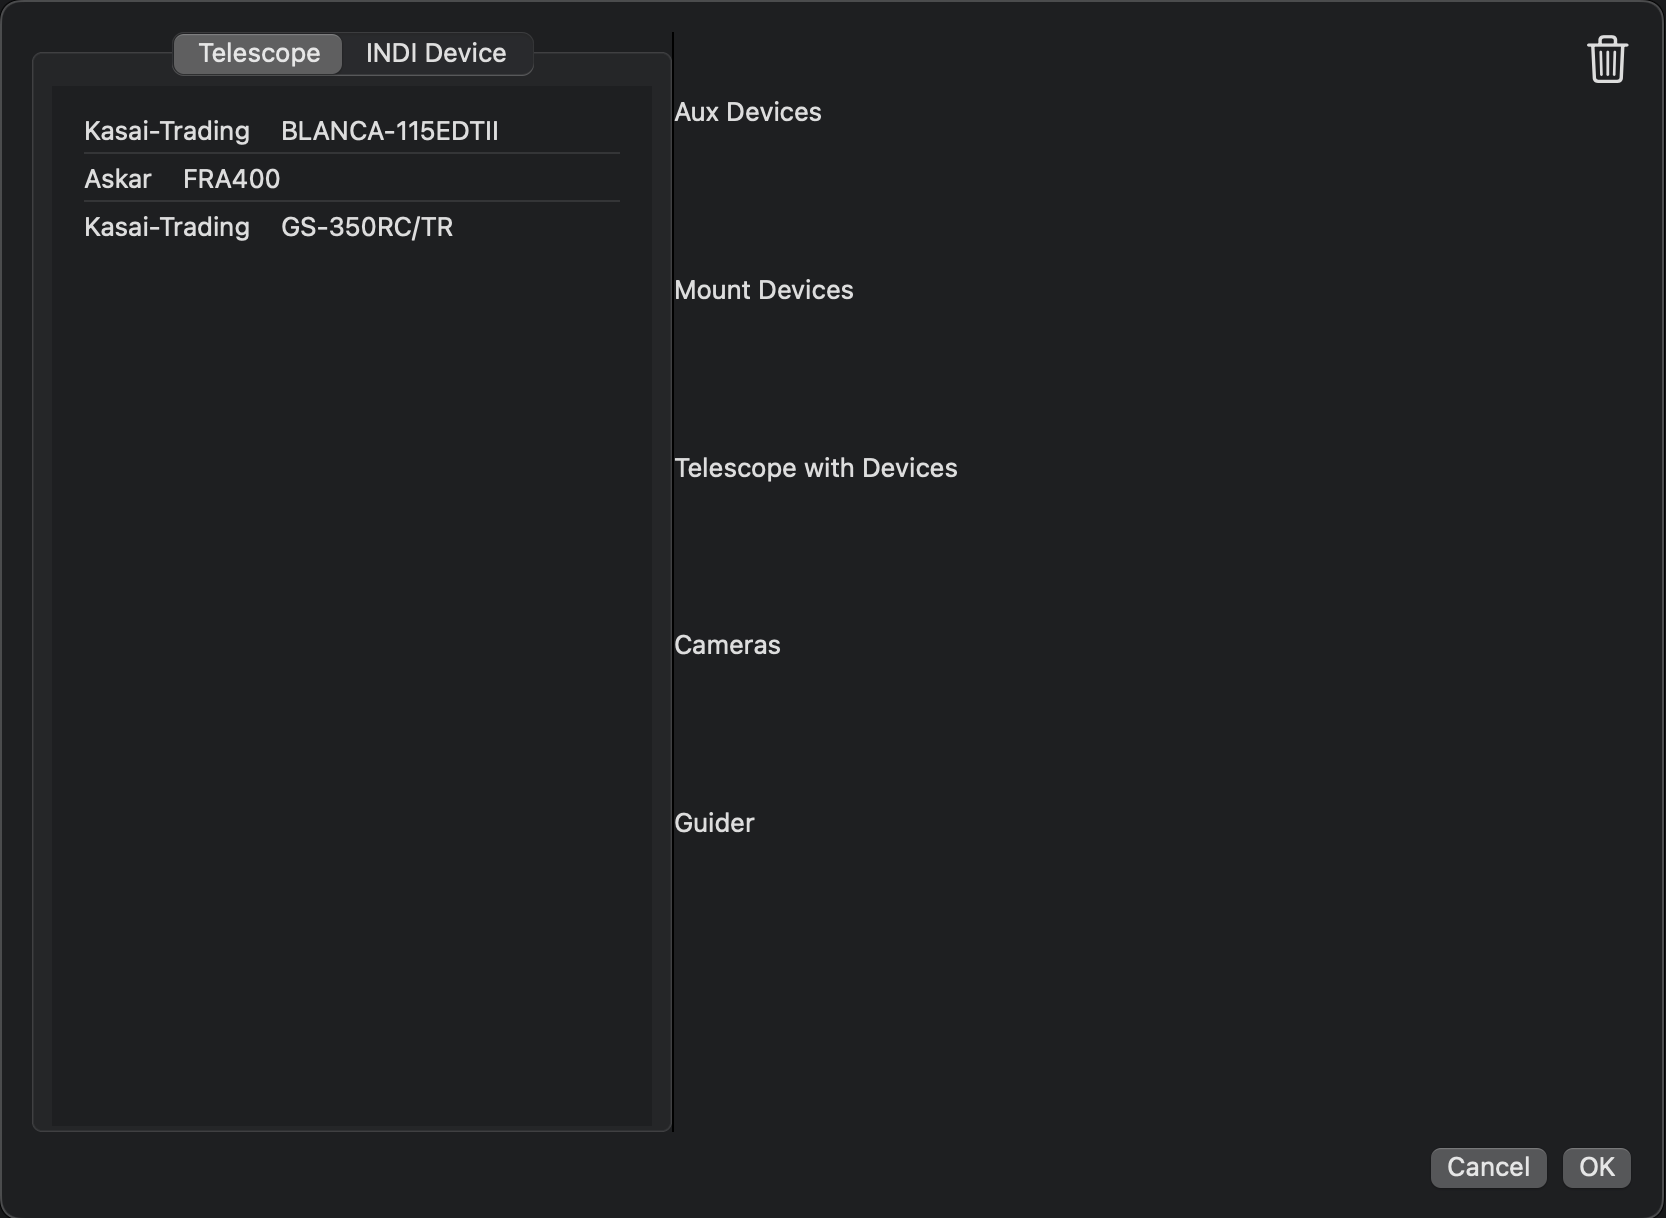 nfiguration window will be displayed. The Device Configuration window displays a list of telescopes on the left and a list of INDI devices on the Device Configuration screen. Drag and drop the telescope or INDI device you want to use from the list to the right.
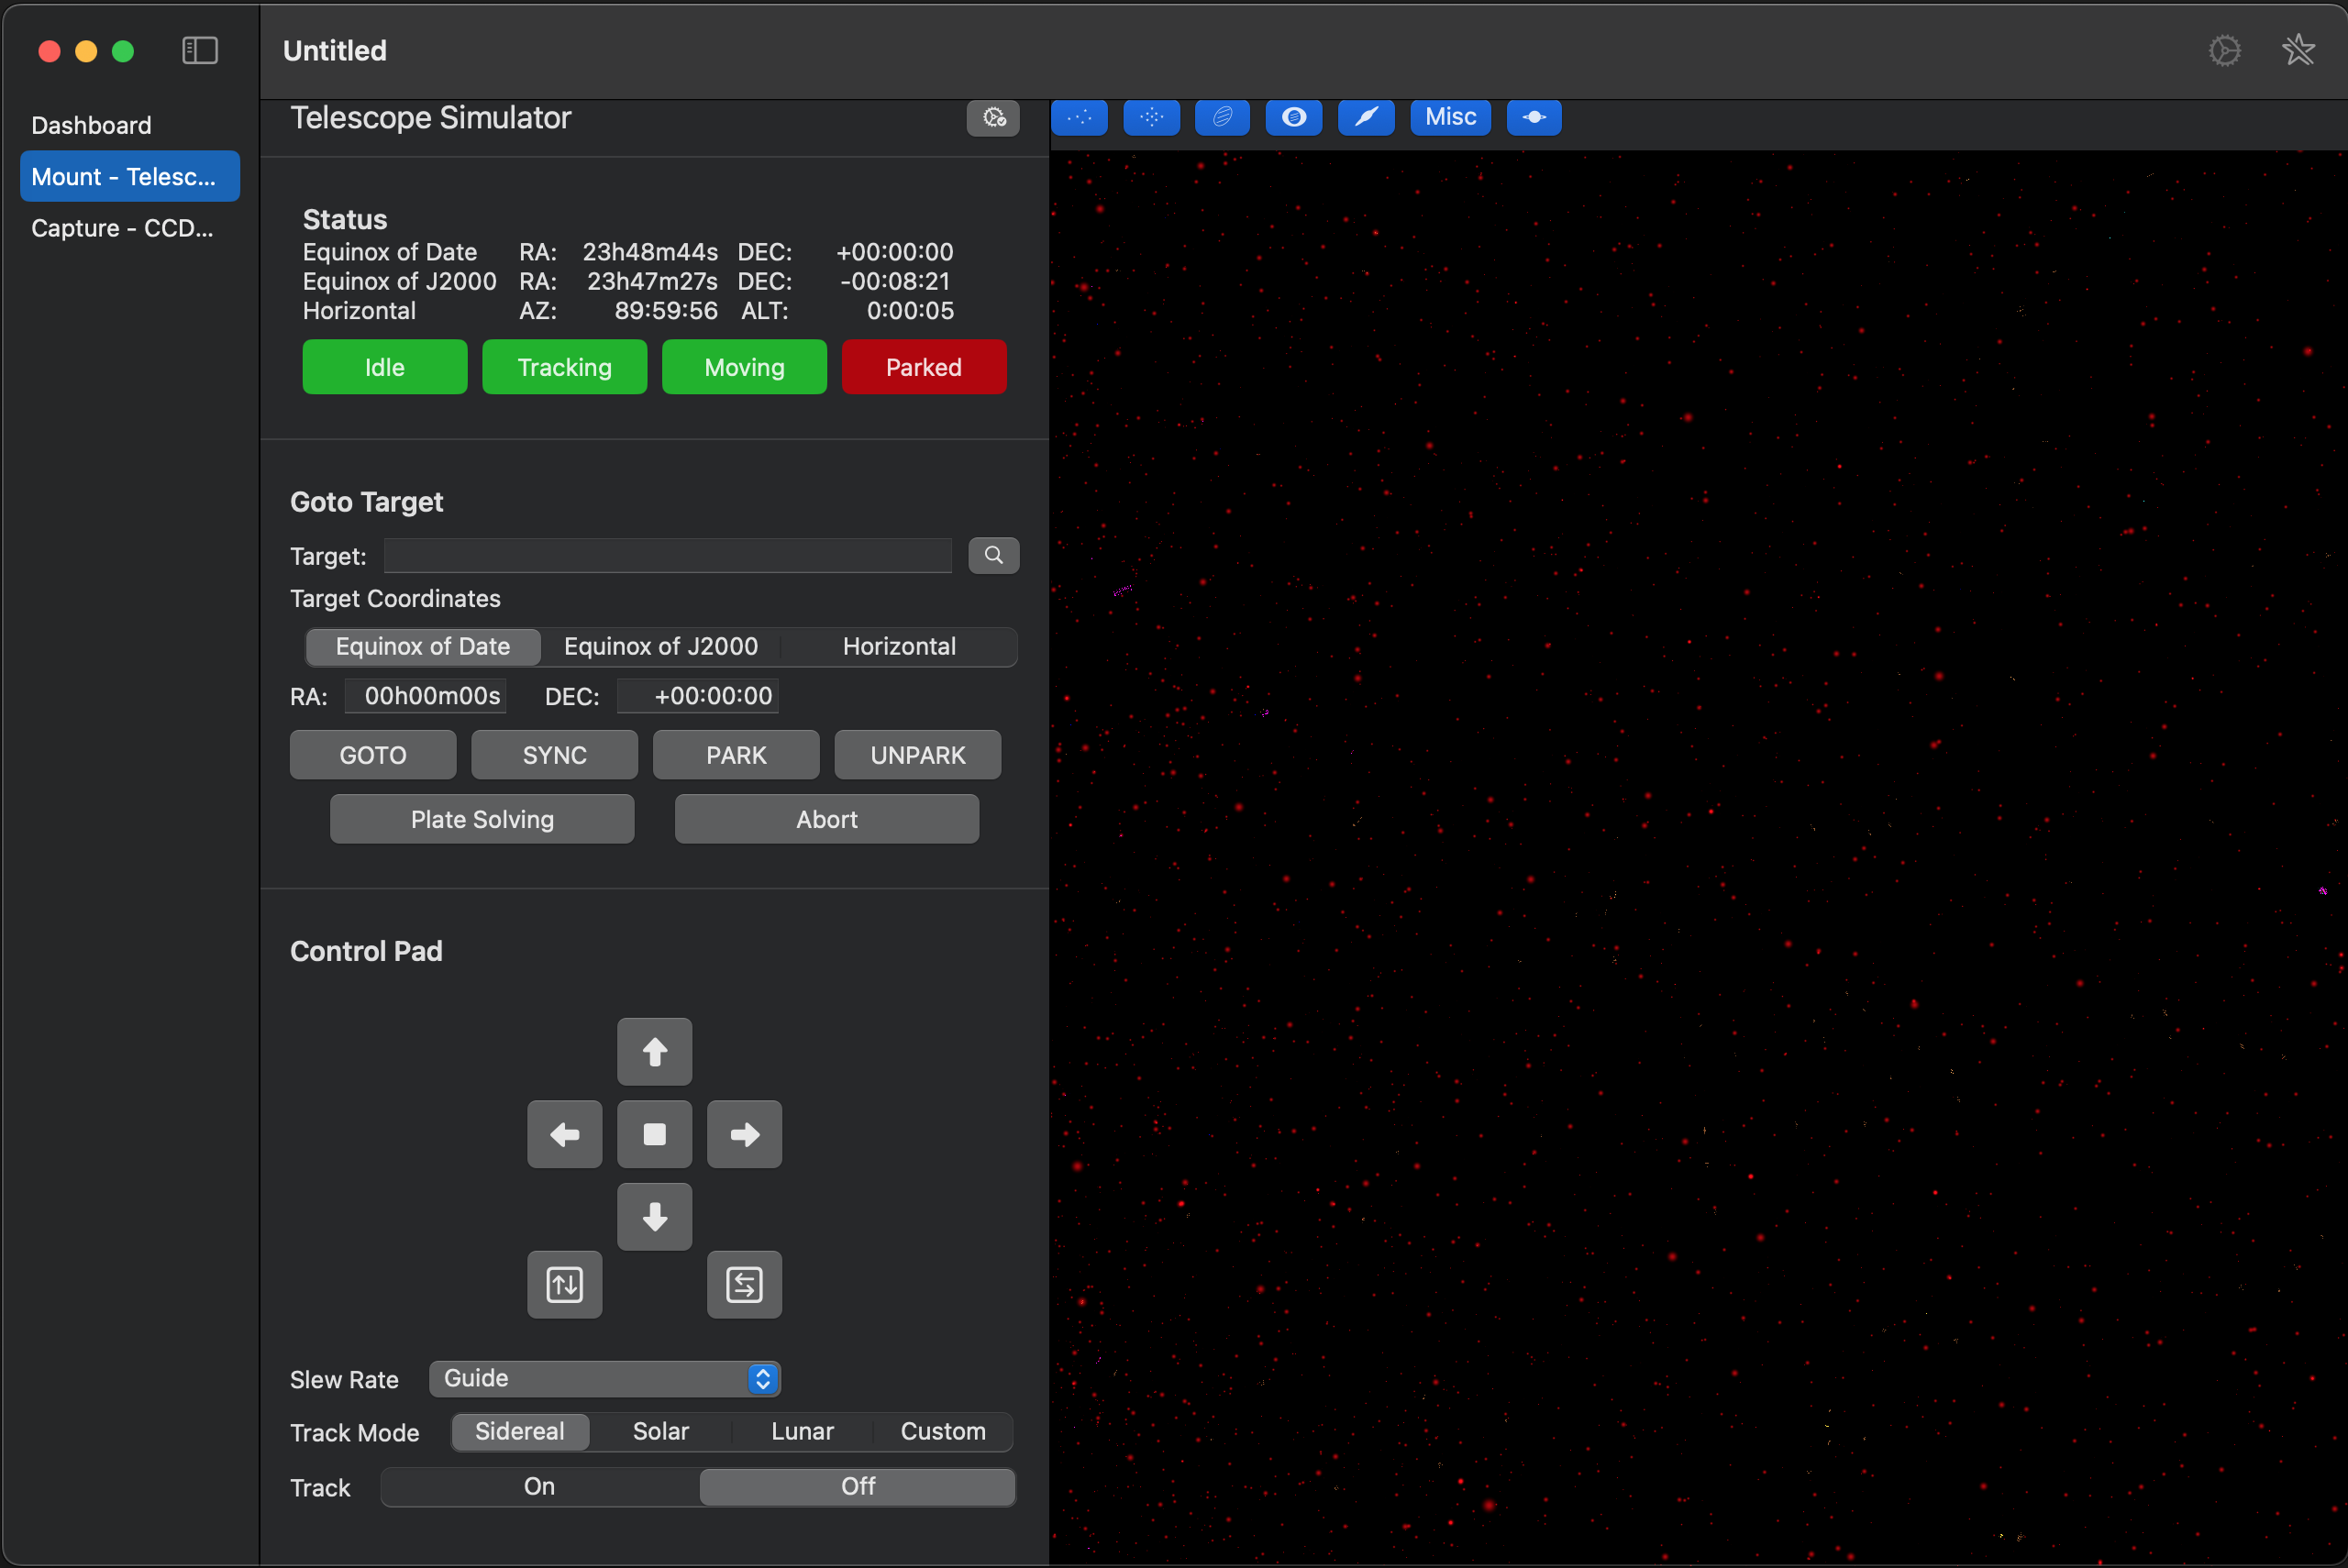 window, and camera control window will be displayed. At that time, if the latitude, longitude, and altitude have not been set, a window will be displayed to input the latitude, longitude, and altitude. If you do not enter the latitude, longitude, and altitude of the observation site here, the equatorial mount will move unexpectedly and cause an accident, so be careful.
 on the star chart on the right to select the celestial body. After that, click the introduction button and the equatorial mount will start operating toward the target delayed.
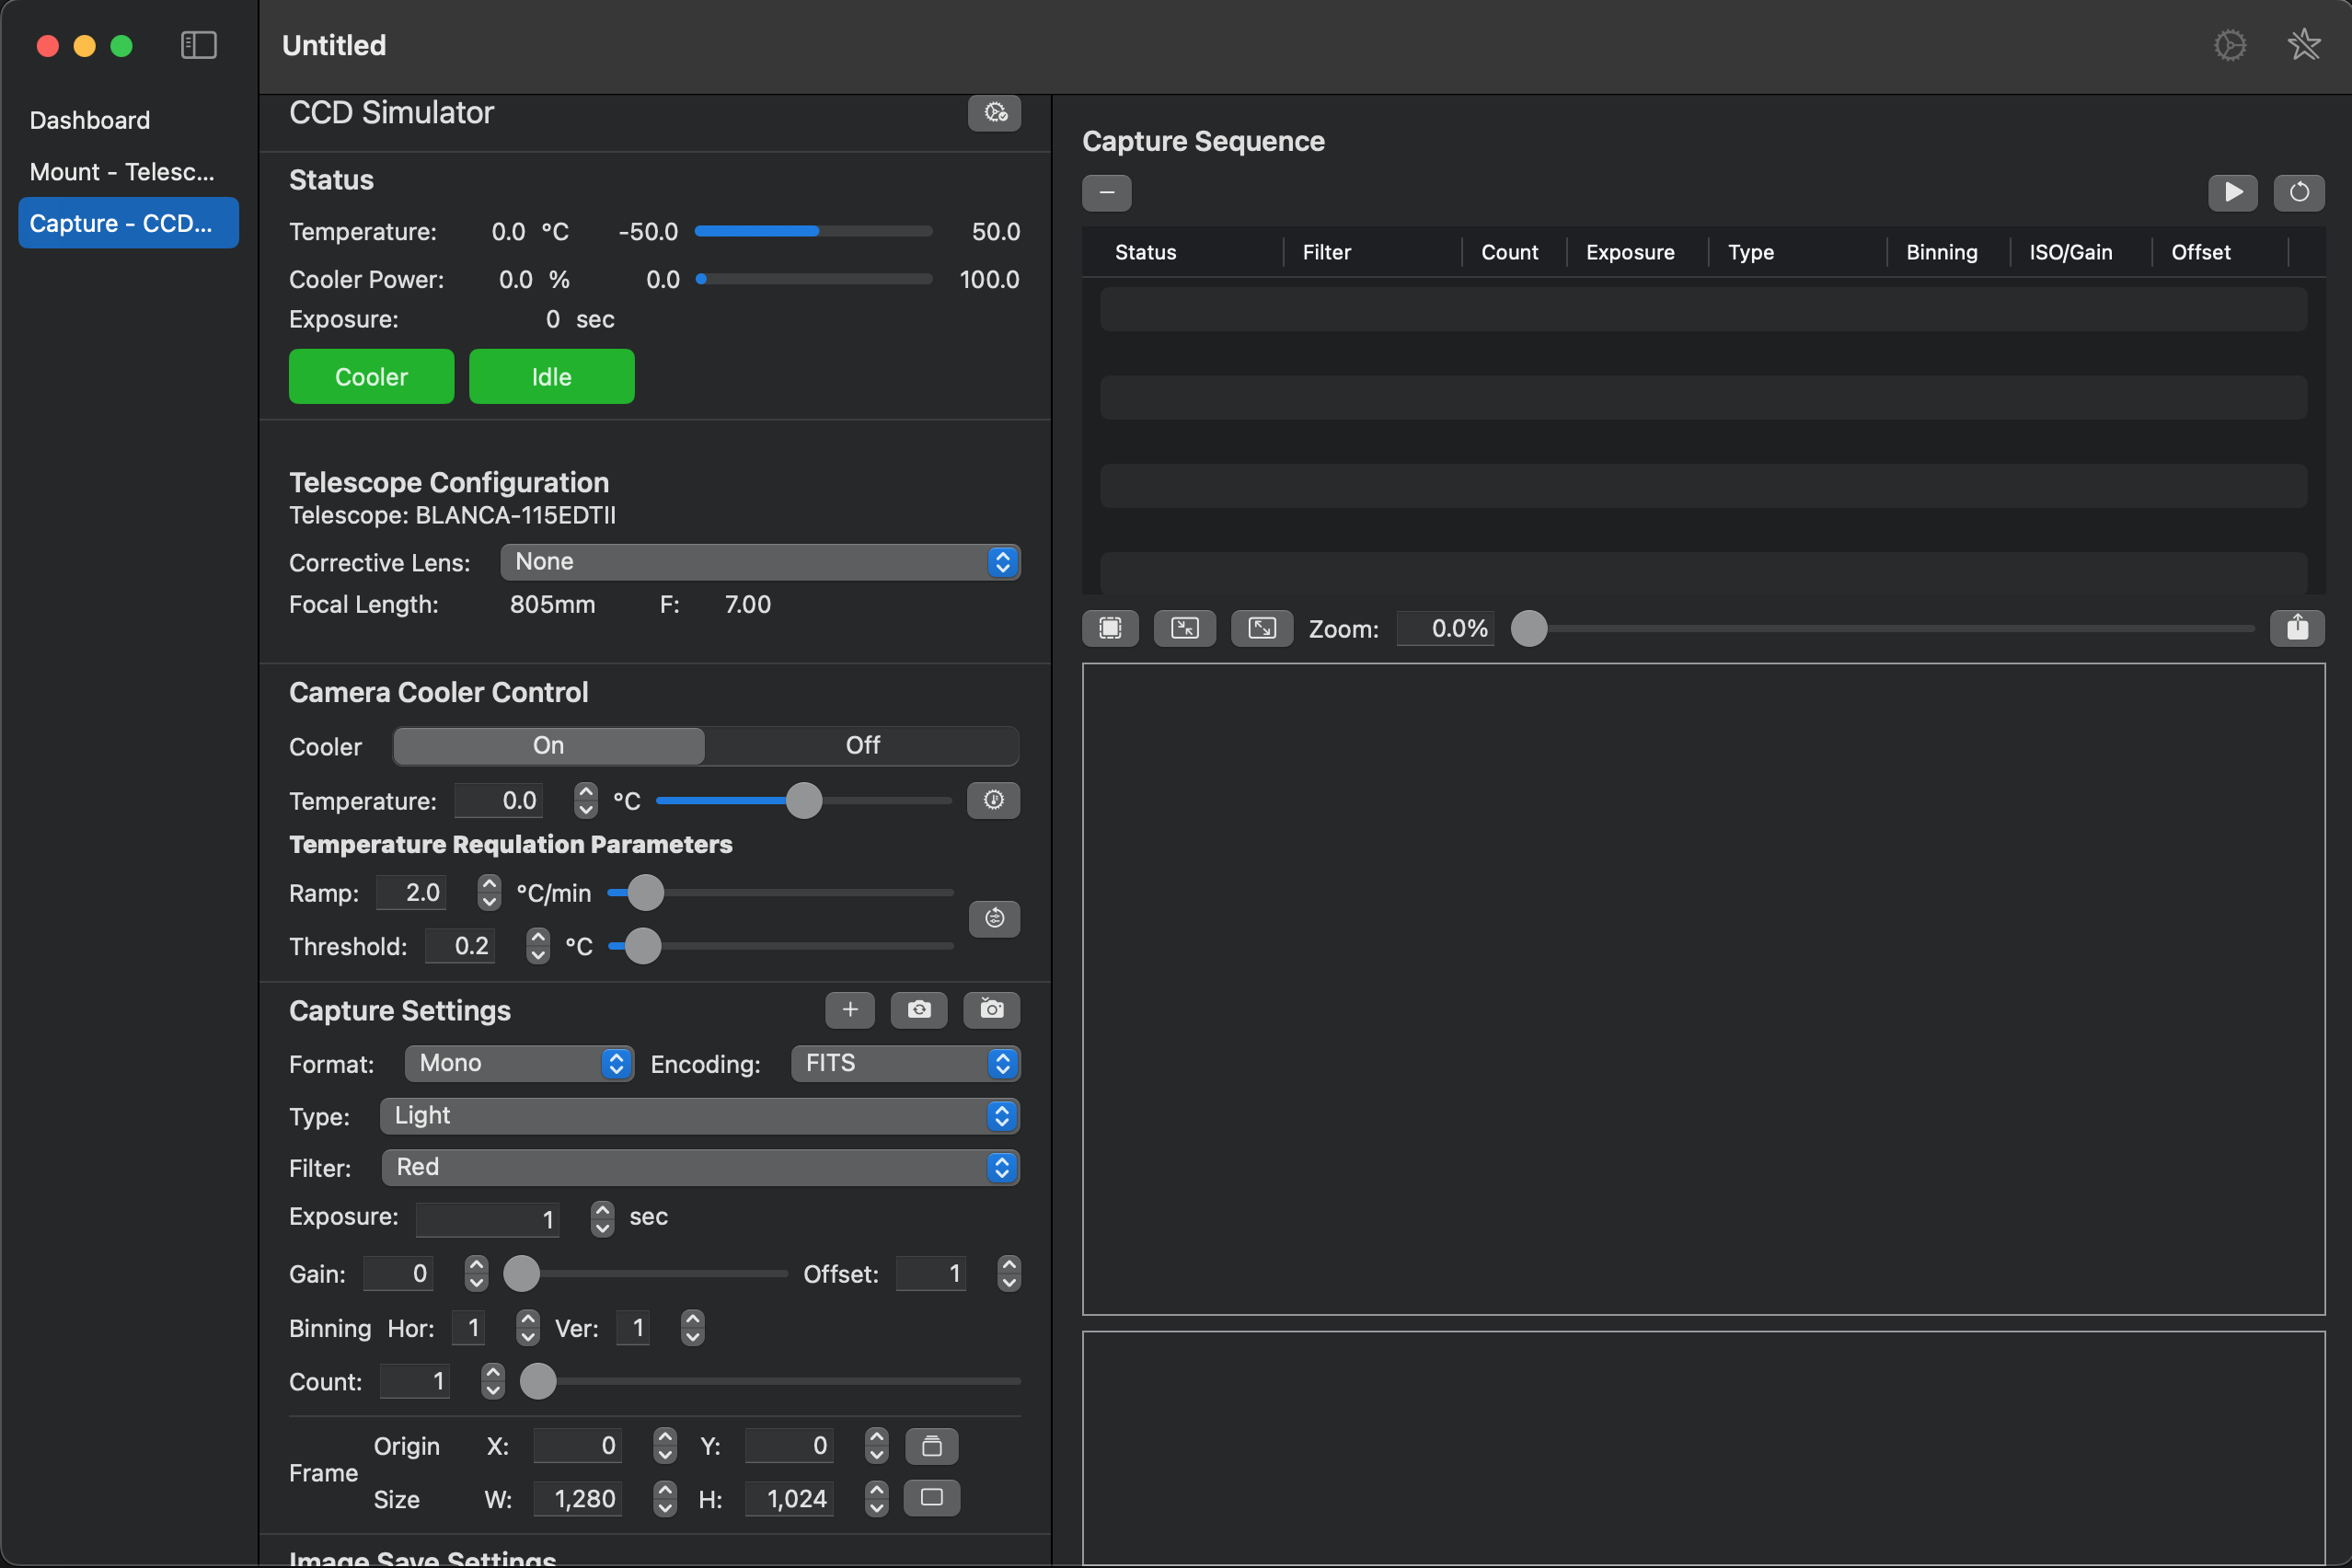 trol screen. To the right of the + button is the button for loop shooting. To stop loop shooting, the icon of the loop shooting button will change to ■, so clicking the same button will stop loop shooting. To the right of the loop shooting button is the single shooting button. Like the loop shooting button, clicking the same button during shooting will stop shooting.
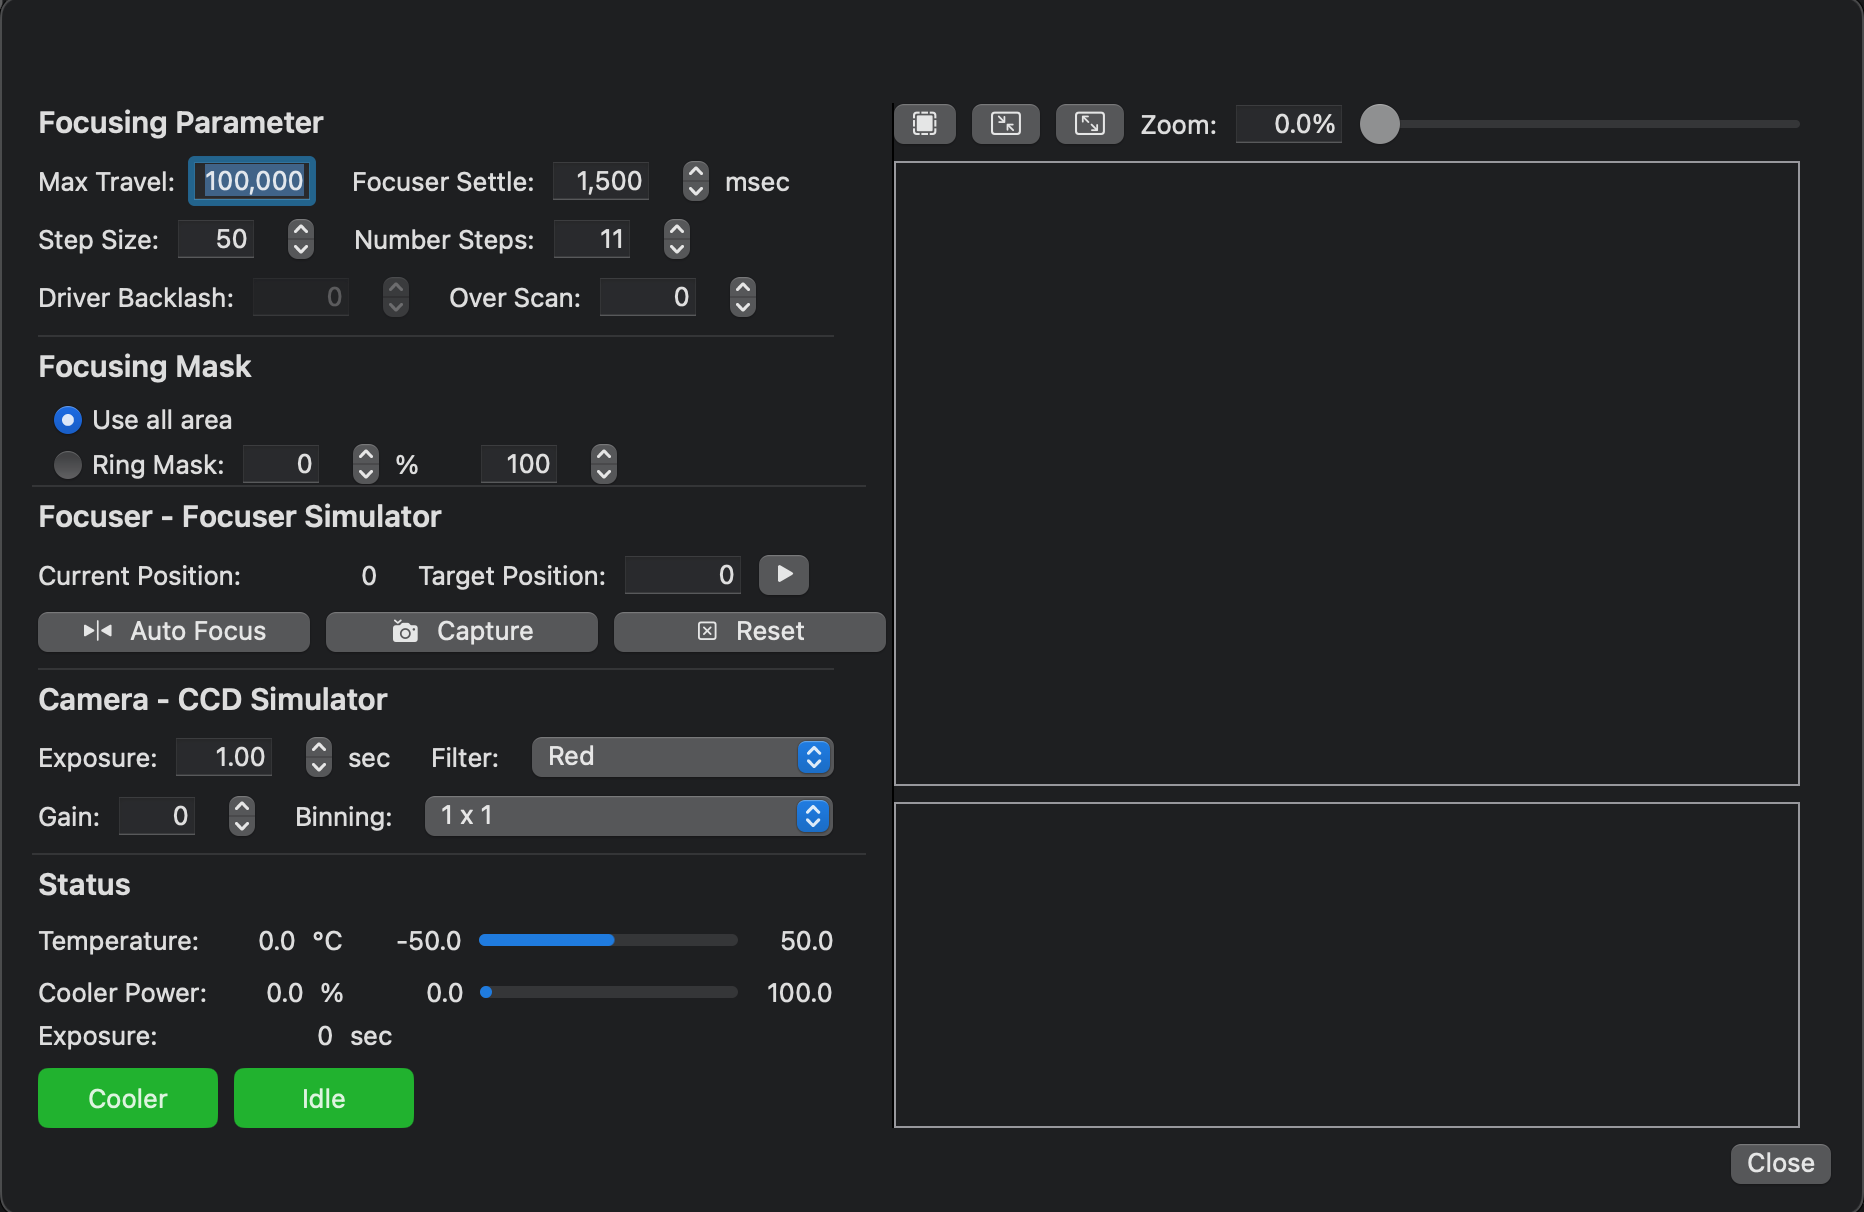 and the histogram display area.